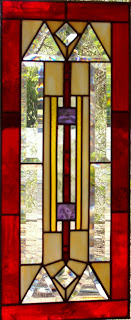
Welcome to Rick Hickmann Art Glass!

I hope to share with you my love of stained glass. I view my glass work as an art form so every design is my own creation and I do not repeat designs in my windows. I enjoy the challenge of creating a work that becomes a part of the personality of the clients and also fits in with the interior decorating. Feel free to make comments, ask questions, or critique any of my postings. If you click on the slideshow to the right you can view the pictures in a larger format.
Contact me at;
rlhickmann@bendbroadband.com or rhickmann@hotmail.com ;please put stained glass in the subject.

Sunday, December 14, 2008

Eagle rock windows installed


A couple of pictures of just the windows from inside with natural light.
Posted by Picasa

Eagle Rock windows installed


Here is a couple of picutres of the entry to the Fireplace Room.

A couple of pictures from the inside.
Posted by Picasa

Thursday, October 2, 2008

I decided to add one more of the center section. In this one you can really see the variations and look at the background glass. The lines you see really add depth to this. It is a nice setting for the colors of the flowers to make them stand out.
Posted by Picasa
Here are the two windows finished and leaning in our front window. I will be installing them on October 25th and then posting pictures of them in the location.

This is a close up of the top left flower so you can see the color changes in the petals.
This is the bottom part the window. Even these don't give a good idea of the background glass variation in color and intensity. I can't wait to see them in the front door!
Posted by Picasa

Friday, September 26, 2008


I thought I should provide some pictures of the setting. The first picture is the entry door that my windows are going into. The stained glass you see is in bad shape and really close to falling apart. The bottom picture Linda won't like but it is standing in the same place as the first picture and just turing slightly to the left. You can ignore the snow it NEVER snows there, especially in April when this was taken. However all those flowers peeking out of the fresh snow were pretty..............what a wonderful relaxing place!
Posted by Picasa
I am going to take you through an overview of the process in designing and building a window.
This project is for the Dershams at Eagle Rock Lodge on the McKenzie river. If you ever want to get away to an absolutely gorgeous relaxing place with an incredible breakfast you should head to this place. It is beautiful!!!!
The design is drawn to full scale and two copies are made.
One is to provide the layout of the glass to make sure it is fitting the
desired size. If you get this wrong boy do you have troubles. It
is not good to build a window that will not fit the opening!
The other sheet is the actual pattern. Each piece is cut out,
layed on the glass and marked then the piece of glass is cut
and layed out. The steps before reaching this point are actually
quite time consuming, meeting and discussing ideas, doing
research on the topic of design, sketching out ideas, then
drawing up a design from the sketches. I then discuss this with the client
to get input, make changes, and get a basic color selection.
Pricing is decided and agreed upon before I draw up the full
sized design and purchase supplies.
Posted by Picasa
After I have the design finished to scale I purchase the glass
and supplies. I go to Portland to select my glass from among
thousands of pieces of glass. The pieces shown here are about
four square feet each so they are large pieces of glass. Notice
the difference in these pictures. They are the same pieces of glass
but in the top I tried to photograph them so you see the glass
without the backlight or as they would be viewed at night.
The bottom picture is with the sun behind them lighting
them up. It is an example of why I tell people that the windows
can change colors depending on the light and type of glass.
Posted by Picasa
Here is the window in the process of cutting out the glass.
I have started at the bottom of the window and I'm working
my way up and observing the overall design. Each piece of
glass I cut I consider how I lay it out on the large sheet of
glass I cut it from. You'll notice an example here in the blue
violet background color. I am considering the "flow" of the glass
in this case wanting the colors to be flowing horizontal and
swirling in the background.

Posted by Picasa
Taking the full sized pattern I cut out each pattern piece.
I then lay each pattern piece on the piece of glass I have
selected. I take the glass cutter, the yellow handled thing
laying there and I cut around the pattern. When I lay the
pattern on the glass I choose the color variations and swirls
in the colors to fit the overall design and desired effect.
There is apporximately a 25% waste factor of the glass in
doing this but worth it. Well worth it if I have done my price
calculating accurately. As my wife will gladly testify I have
certainly not always done that in my desire to pursue this
passion of mine.
Posted by Picasa
Here is a view of the begining stage of soldering. I have not included a picture of the foiling process before this which is quite time consuming. Each piece of glass has the outer edge wrapped in copper foil. You can see the copper foil in this picture. It has to completely cover the edge and be flattened to the glass all the way around and on both sides. This is why the per piece price! Each piece cut out of glass and then hand wrapped with foil, well lets just say time consuming and can you spell "patience"? In the soldering process I lay
the pieces out and start around the exterior barely tacking
the pieces together. Then I carefully move each piece around
to get them fitting together before soldering.
Posted by Picasa
Soldering the foiled pieces together. The spool of solder is on the left.
The soldering iron I'm holding melts the solder to the copper foil.
Metals need to be compatible in order for them to melt together.
Not just any metals can be soldered and melted in to one solid.
Hey it's chemistry! Don't ask me I'm an artist, I just use science
I don't understand it!
Posted by Picasa
This is applying flux to the copper foil. It basically prepares the copper
foil so the solder, a mix of tin and lead, will stick together to bond
it into a solid metal that holds the whole work together.
Posted by Picasa
This is always a fun but worrisome part. The first time I pick it up to view it
with the light behind. It is really unfinished at this point. Greasy, dirty,
soldering to finish and the edge unfinished but I always look forward to this to
analyize and critique my work. I realy try to picture the setting it will
eventually go in and in this case another window to go along side. I think
it is going to fit really well into the setting. A main entry door to a room
at Eagle Rock Lodge on the McKenzie river.
Posted by Picasa

Sunday, September 14, 2008

Calla Lilly


The newest window corner a Calla Lilly 9/2008
Posted by Picasa

Monday, September 1, 2008

Picasa Web Albums - rick - Stained Glass...

Picasa Web Albums - rick - Stained Glass... This is a web album of my work. This has pictures that are included in my blog but I thought having them in one location is easier. I do have comments in my blog posting with each piece of work so if you see one you like you might go to that posting to get further info.

Sunday, August 3, 2008

This the next in my window corners.
I just could not do a basic view of a
sunflower. This one looks like a
sunflower on a windy day. It is now
on sale at Acaidia Footwear in the
Old Mill District in Bend.
Posted by Picasa

Tuesday, July 1, 2008

Window corners

This is something new I'm trying. These can be mounted in any corner of a window. A couple of years ago Linda suggested this and I'm finally giving it a try. This fits well with my thought of providing affordable art. There are people who appreciate art but can not afford it for their homes. I want to make some of my work available to most anyone. If someone can not afford a full window they can get one of these or even have me create one for them. These can also serve the purposes of blocking direct sunlight, providing some privacy without covering an entire window and add color to a home. These could also be designed to go all the way across an opening and then installed as a valnce or on the bottom portion of a window to provide privacy with a view.


Posted by Picasa

Sunday, May 4, 2008

Trey's Double Flip


Trey's Double Flip May 2008
I made this window just to do something a bit different. I really am more drawn to nature when
designing on my own. I need to branch out and try other styles. So I made this window as just a basic geometric design. I always like to put my finished work in one of our windows to critique my own work. I had it in our front window for weeks just watching and thinking about it. It had a very narrow red border that I had decided I should have made it wider and thus bolder. Trey was sitting on the back of the couch waiting for his grandma to get home. I went to answer the phone and just as i did I turned to see Trey's elbow swing around and hook the window. It was one of those slow motion feelings watching the window flipped onto the couch, flipped again and landed on the floor. It broke the outside border only. Trey was really upset and I had to assure him accidents happen. I let it sit in the window broken for a few more weeks not really wanting to do a repair since I don't like doing glass repairs. When I did tackle it I decided to fix the whole thing and redo the border nice and wide. It definitely helped! Since this window can be viewed whichever way one wishes it really can be flipped around to create a different kind of feeling.
So as I was finishing and Trey was "helping" me finish the repairs he again apologized for breaking my window. I figured I really needed to name it after him after that. So the fact it can be flipped around for viewing and the fact that a double flip broke it so I could fix a design flaw what better name than Trey's double flip?
Posted by Picasa

Friday, January 4, 2008

Pink Dogwood in Spring


Pink Dogwood in Spring -2008

A couple of years ago we visited Pete Samuel in Paradise California in spring. We would sit looking out his window at a pink Dogwood in bloom. I have had that scene in my head waiting for some time to make it in glass. I finally made the time. I have also tried something different in an effort to push myself into new areas of possibilities. I have always felt that in stained glass lines are a necessity, holding the pieces of glass together, so the line should be as much a part of the design as the main theme. Here I have accentuated that by turning the lines into branches. Then I added foil overlay to get side offshoots and buds. I will be returning to this idea and keep pushing that direction. We'll see what develops. I also have beveled glass pieces as a border that are done with lead came. The interior section of the window is done with copper foil. I like the idea of combining these so will probably doing more of that also in the future. *see below
This window will be hanging for sale in Acadia Footwear in the Old Mill District in Bend.


*there are two ways to build a window. Lead came which is shaped like this H. The edge of each piece of glass is inserted into the "H" and the joints soldered to hold it all together. The
other way to build a window is to wrap the edges of each piece of glass in copper foil. Then
all the exposed copper gets soldered to hold the whole thing together.
Posted by Picasa